
01 - Jupyter Notebooks
Introduction to Jupyter
In this workshop we're using a software platform call the Jupyter Notebook. This lets you write an electronic notebook combining text (with basic formatting like italics or bullet points) and snippets of functional programming code (here we're using the Python programming language).
You access a Jupyter Notebook through a web browser, but rather than depending on a server out on the internet, you can run Jupyter on your own computer.
In this case both Jupyter and the web browser will run on the Linux server setup for this workshop, and you'll access them from your Windows Desktop.
Launching Jupyter
Open your command line terminal (i.e. Git Bash on Windows), and then at the command line prompt run:
$ cd ~/2018-03-06-ibioic
$ jupyter notebook
...
The first command cd is short for "change directory", and just changes into the course directory so that all our sample data and the course notebooks are easy to find.
The second command starts Jupyter. It should print various outputs to screen, and launch your default web browser, showing the Jupyter Notebook Dashboard.
This should show a file list coresponding to the course directory which we looked at earlier:
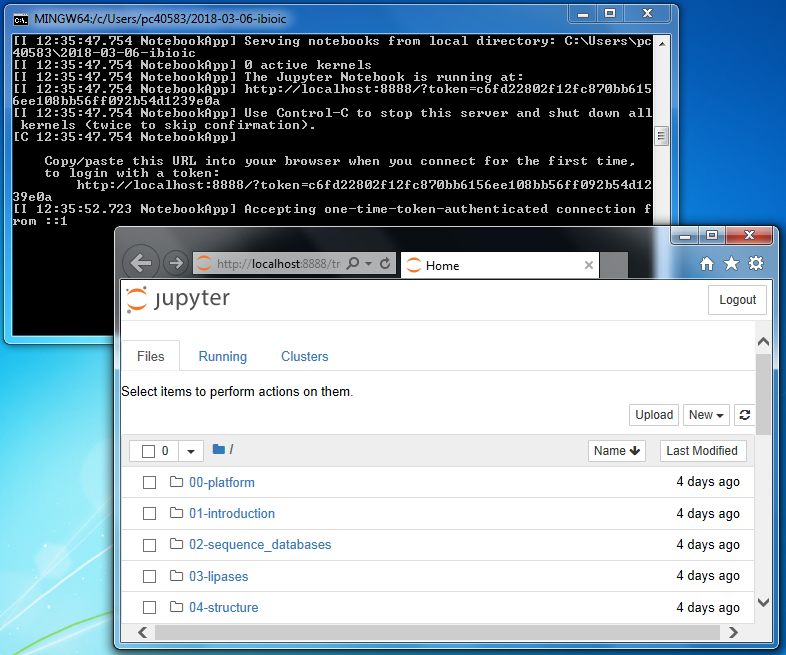
Notice in the web-browser address bar that the URL starts localhost:8888/ where localhost is a special address for the local machine itself (not somewhere else on the network or internet).
Opening a Jupyter notebook
From the Jupyter file listing (the "Jupyter Notebook Dashboard"), click on the 00-platform entry (which has a folder icon). This should show you the contents of the directory ~/2018-03-06-ibioic/00-platform/.
Confirm Jupyter is showing the same files as when you used ls at the Linux command line. Like many of the core Unix/Linux command this an extreme shortening, ls is short for "list":
$ ls ~/2018-03-06-ibioic/00-platform
Back in our browser looking at the "Jupter Notebook Dashboard", clicking on the 01-jupyter.ipynb entry should open in a new tab. You're now looking at this file run from inside Jupyter.
Cells inside a Jupyter notebook
So far we've not taken advantage of the key feature of Jupyter Notebooks - in addition to blocks of pretty text, you can have real live code too. Jupyter calls each block a "Cell", and here we'll use two main kinds of cells:
- Markdown - Pretty text which can include simple formatting like italics, bullet point lists, and images.
- Code - Live code, here setup to use the Python 3 programming language.
The next thing in this notebook is a code cell where you can type Python 3 code. The usual keyboard controls work with minor changes:
- Pressing "Enter" will start a new line of code.
- Pressing "Ctrl + Enter" will run the block of code, and show the output.
Let's try it now with a traditional minimal Python example:
print("Hello world")
This is a "Markdown" cell. You can edit this too if you first double click it to enter edit mode.
Once in edit mode the background colour changes and you get a green outline. The text also changes:
- This bullet point lists is now shown with minus signs.
- This text which was in italics now has asterisks around it.
- This text which was in bold has double asterisks.
From Jupyter's edit mode in a markdown cell:
- Pressing "Enter" will start a new line of text
- Pretting "Ctrl + Enter" will leave edit mode, and show the pretty text.
Try editing this Markdown cell, using basic formatting like italics, or bold, or including a website link like Markdown.
Python inside a Jupyter notebook
We're going to introduce some programming concepts using the Python programming language.
Python lets you work with simple data objects like booleans (defined with keywords True and False), numbers (like 1, 1.3, or 1.23e-4), and strings (using double-quotes like "Hello world" or single quotes like 'Hello World'), and more complicated objects too including lists, sets, dictionaries.
Numbers in Python these support the numerical operations you might expect, plus some additional operations where you might guess the meaning:
1 + 2
2 * 3
14 / 3
14 // 3
For a single line expression like that, you don't need to bother with a print(...) as Jupyter will just show the result. But in general with multiple-line Python snippets you would need the print() bits:
print(1 + 2)
print(2 * 3)
print(12 / 3)
Python, like most programming languages lets you define variables, names for values which can change when the program is run. There are some restrictions on the characters you can use (letters, numbers, underscores) but convention is to use lower case names with underscores.
welcome_message = "Hello world"
print(welcome_message)
We've used the print(...) function without really explaining it. Python has lots of built-in functions (and you can define your own), which are called with the brackets enclosing any arguments (instructions).
Another commonly used built-in function is len(...) which gives the length of a string or more complicated data structure:
# Lines starting with a hash (#) are comments
# This assumes the earlier cell defining welcome_message has been run
print("Number of letters in message:")
print(len(welcome_message))
The above example is also intended to show that the bits of Python in a Jupyter notebook are not self contained. You can deliberately break up the code with blocks of text like this - and this is very useful.
Making a new Jupyter notebook
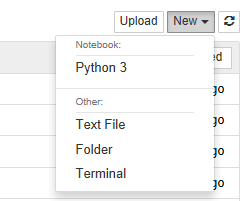
From the Jupyter Notebook Dashboard (the first tab opened back when we started Jupyter), there is a drop-down menu option top right, "New", then "Python 3" (under the "Notebooks" section):
From an existing Jupyter Notebook there is an entry under the menu (top left), "File", "New Notebook", "Python 3".
Either will create a new initially named Untitled Notebook. By clicking on this default name (Unititled), you can give it new name (the extension .ipynb is added automatically):
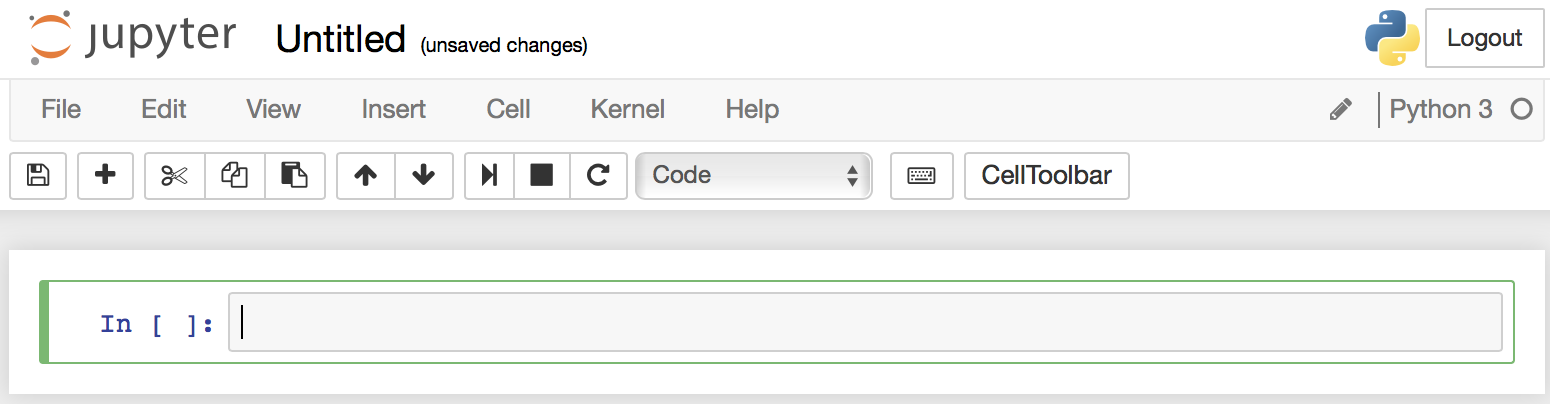
To save the new notebook, goto the menu (top left), "File", "Save and Checkpoint" - or use the save icon just underneither the menu.
We'll ask you to make your own new notebook tomorrow for one of the exercises.
Resources
- Jupyter Notebook Basics
- Jupyter Markdown cells
- Markdown (original definition and tool)
- CommonMark (community effort to formalise the Markdown standard)
- Python